
Affiliate Disclosure: YourGourmetGadgets.com is a participant in the Amazon Services LLC Associates Program. We earn a small commission from qualifying purchases at no extra cost to you. We only recommend products we genuinely trust. This guide focuses on stainless steel cooking tips and techniques.
You just started your stainless steel cooking journey, fired up the pan, and watched your eggs weld themselves to the surface like they paid rent. Sound familiar? Don’t throw the pan out yet — the problem almost certainly isn’t the pan. It’s the technique.
Stainless steel cooking is one of the most rewarding skills a home chef can develop. Stainless steel pans are versatile, durable, and chef-approved — but they have a reputation for being “sticky” that’s almost entirely undeserved. Once you understand why food sticks — and the simple steps to prevent it — you’ll wonder why you ever reached for a nonstick pan at all.
In this guide, we walk you through exactly how to stop food from sticking to stainless steel, cover the science behind it, and recommend the best tools and products on Amazon to make the whole process easier.
Table of Contents
- Why Food Sticks to Stainless Steel
- The Water Droplet Test (Do This Every Time)
- Use the Right Oil — And the Right Amount
- Don’t Move the Food Too Soon
- Dry Your Food Before It Hits the Pan
- Best Amazon Products for Stainless Steel Cooking
- More From Gourmet Gadgets
- FAQ
Why Food Sticks to Stainless Steel (And How Stainless Steel Cooking Really Works)
Stainless steel isn’t actually smooth at the microscopic level. It’s full of tiny peaks and valleys. When you put cold food onto a hot pan — or worse, onto a cold pan — those tiny ridges bond with the protein or sugars in your food. That’s your sticking problem right there.
The good news? Heat breaks that bond. When food reaches the right internal temperature, it releases naturally from the pan. That’s the Maillard reaction doing its thing. The sear happens, the crust forms, and the food lifts cleanly. Your job is simply to set the right conditions so that release can happen.
The Water Droplet Test (Do This Every Time)
This is the single most important technique you can learn for stainless steel cooking, and it takes about five seconds.
- Place your stainless steel pan over medium heat.
- Wait 2–3 minutes for it to heat up evenly.
- Flick a few drops of water onto the surface.
- If they sizzle and evaporate immediately, keep heating — it’s not ready yet.
- If they bead up and roll around like mercury, that’s the Leidenfrost effect. Your pan is perfectly preheated.
Therefore, once you see that bead-and-roll behavior, add your oil. That one simple test prevents the majority of sticking disasters before they even start.
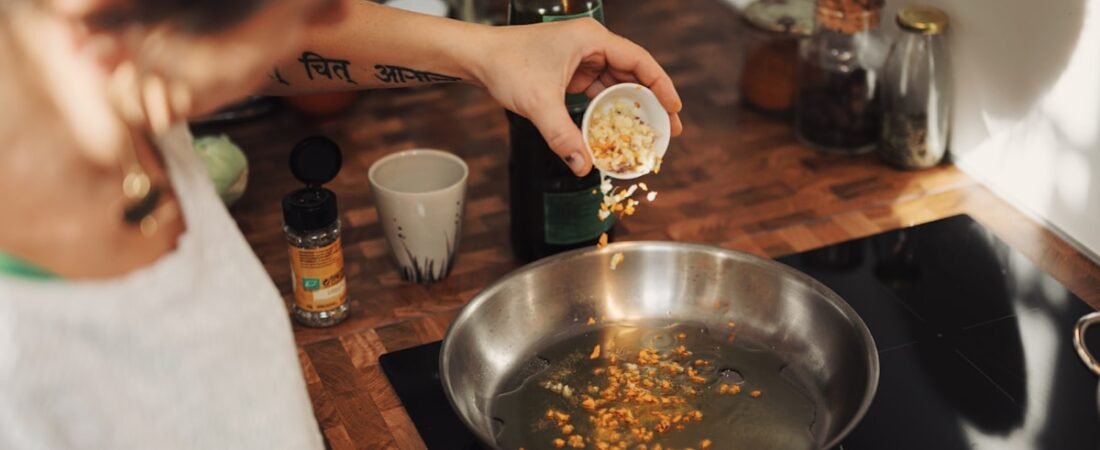
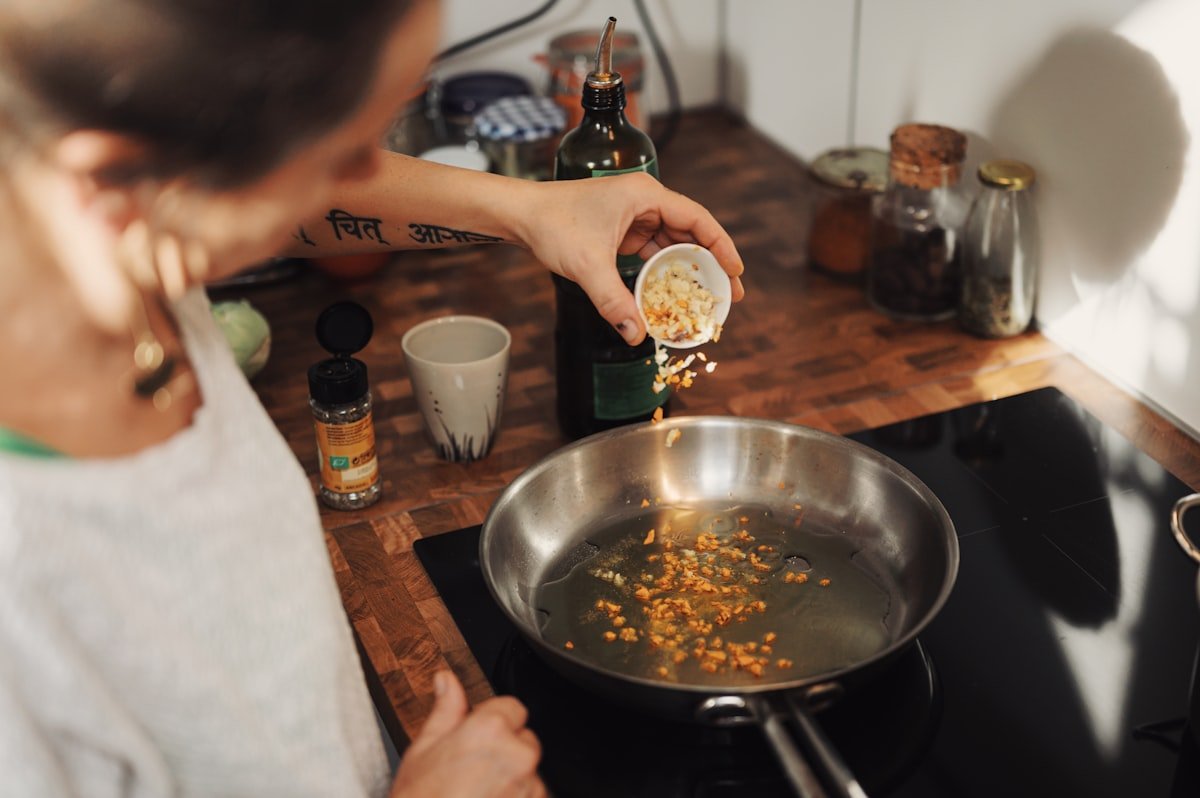
Best Oils for Stainless Steel Cooking — And the Right Amount
Additionally, after the water droplet test passes, add your oil. Coat the bottom of the pan in a thin, even layer — tilt the pan if needed. Then wait 20–30 seconds for the oil to heat before adding food. Not all oils hold up the same way at high heat:
- Avocado oil — Smoke point ~520°F. The best all-around choice for high-heat searing.
- Refined coconut oil — Smoke point ~400°F. Great for medium-heat cooking.
- Clarified butter / ghee — Smoke point ~450°F. Adds rich flavor and works beautifully with proteins.
- Extra virgin olive oil — Smoke point ~375°F. Fine for lower-heat sautéing, not for searing.
🥑 Best High-Heat Cooking Oil
Chosen Foods 100% Pure Avocado Oil — Cold-pressed, refined, and neutral-tasting with a sky-high smoke point. It’s the go-to oil for stainless steel searing without burning or smoking up your kitchen.
Don’t Move the Food Too Soon
This one feels counterintuitive, but it’s critical: leave your food alone.
In fact, when you first place food into a hot, oiled stainless steel pan, it will stick — temporarily. That’s normal. The proteins bond with the surface as they begin to cook. But as the crust forms and the Maillard reaction finishes, the food releases on its own. If you try to flip too early, you tear that forming crust and half your food stays in the pan.
Try to lift it gently with a spatula after 2–3 minutes. If it resists, wait another 30 seconds. When it’s truly ready, it slides cleanly — no force needed.
🍳 Best Spatula for Stainless Steel Pans
OXO Good Grips Stainless Steel Fish Turner — Thin, flexible, and angled perfectly for getting under proteins without tearing. Safe for high-heat cooking and won’t scratch your pan surface.
Dry Your Food Before It Hits the Pan
Furthermore, moisture is the enemy of a good sear — and a major cause of sticking. When wet food hits a hot pan, steam forms between the food and the surface. That steam prevents proper contact, delays crust formation, and creates uneven cooking. By the time the moisture evaporates, your food has been sitting long enough to bond hard.
The fix is simple: pat your food dry with paper towels before it goes in. This applies to chicken, steak, fish, tofu, mushrooms — anything with surface moisture. Five seconds of prep makes a massive difference.
🥩 Best Stainless Steel Pan for Searing
All-Clad D3 3-Ply Stainless Steel Fry Pan 12″ — The gold standard in tri-ply stainless cookware. It heats evenly, holds temperature beautifully, and once you master the water droplet test with this pan, nothing sticks. A long-term investment that pays off every single day.
🌡️ Best Infrared Thermometer for Pan Temp
Etekcity Infrared Thermometer Laser Temp Gun — Take the guesswork out of preheating. Point this at your pan and read the exact surface temperature before you add oil. Perfect for nailing the 400–450°F sweet spot every time.
🧽 Best Cleaner for Stainless Steel Pans
Bar Keepers Friend Superior Cookware Cleanser — Sticky residue after cooking? This is the stuff. Bar Keepers Friend removes stuck-on food, discoloration, and heat marks without scratching the surface, keeping your pan in prime condition for the next cook.
Bonus Tips to Stop Sticking for Good
- Season your pan occasionally. Heating a thin oil layer until it smokes and wiping it out builds a light polymerized coating that improves release over time.
- Use medium heat more than you think. Most home cooks overheat stainless steel. Medium is usually all you need — high heat is for searing only.
- Deglaze after cooking. A splash of wine, broth, or water loosens stuck bits and forms the base of an incredible pan sauce.
- Never pour cold water on a hot pan. Thermal shock can warp stainless steel. Let it cool before cleaning.
More From Gourmet Gadgets
Want to level up the rest of your kitchen toolkit? We’ve tested dozens of products so you don’t have to:
🍳 Best Cast Iron Skillets for Everyday Cooking
📦 Best Meal Prep Containers: Leakproof + Durable
Frequently Asked Questions
Food sticks when the pan isn’t properly preheated, when cold food hits the surface, or when you try to move it before a crust has formed. The fix: preheat until the water droplet test passes, add oil, and let food release naturally before flipping.
Flick a few drops of water onto your preheated pan. When they bead up and roll around (the Leidenfrost effect), the pan is at ideal temperature and ready for oil. If they sizzle and evaporate instantly, keep heating.
Effectively yes — not permanently like a coated pan, but with proper preheating, the right oil, dry food, and patience, stainless steel can rival most nonstick surfaces without the coating degradation risk.
Avocado oil is the best all-purpose choice due to its high smoke point (~520°F). Ghee and refined coconut oil work well at medium-high heat. Avoid extra virgin olive oil for high-heat cooking — it burns too quickly.
It’s not required like cast iron, but it helps. Occasionally heating a thin oil layer until it polymerizes builds a light nonstick coating over time and gradually improves performance.
The Bottom Line
Stainless steel isn’t a difficult material — it just has a learning curve. Once you internalize the water droplet test, get your oil timing right, and let your food tell you when it’s ready to flip, sticking becomes a thing of the past. These aren’t tricks; they’re just how stainless steel is meant to be used.
Invest in a quality pan, keep avocado oil on hand, and give the water droplet test five seconds every cook. The results will speak for themselves.
Got questions or a stainless steel win to share? Drop it in the comments below.
— The Gourmet Gadgets Team